

Please note: Advanced Face Shield is an experimental project. I’ve published my designs freely online as I believe they can make a positive impact. Use these designs at your own risk – I cannot guarantee their operation. Improper handling of 3D-printed COVID-19 medical devices can result in death, please review these safety recommendations before commencing.
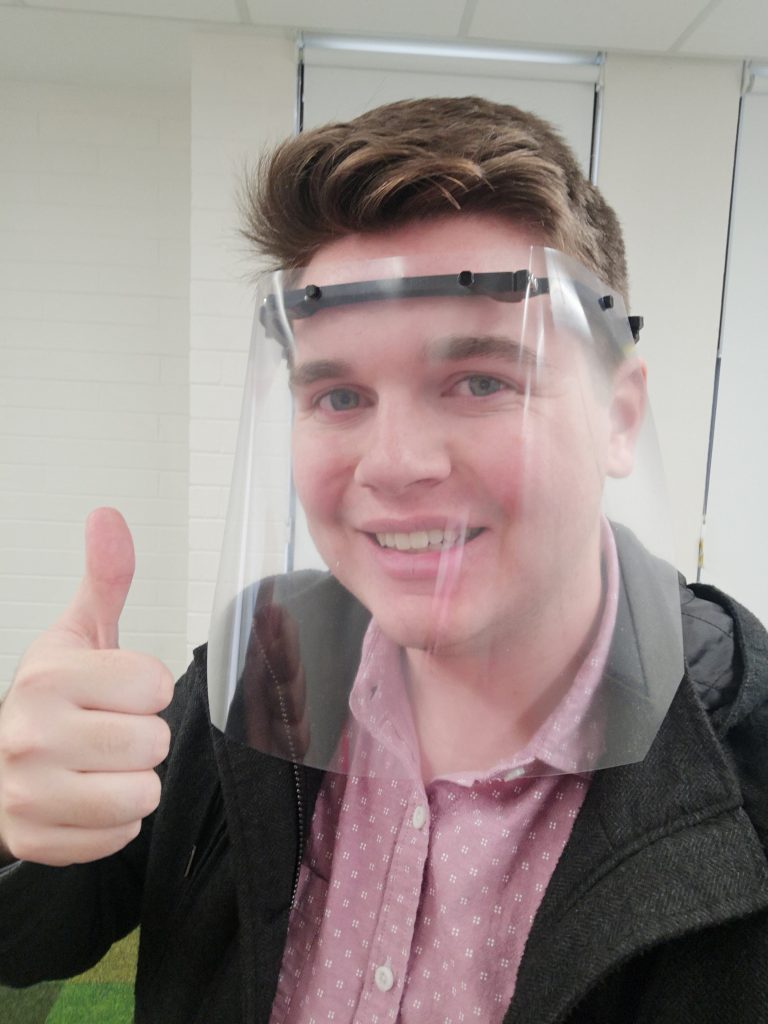
I created the Advanced Face Shield project because at the time there were no good 3D-printed face shields that could be printed on small 3D-printers. My face shield design is comprised of five pieces that can be printed on small 3D-printers and then assembled. This is a guide for doing that.
The Advanced Face Shield project is heavily based on the 3DVerkstan 3D-printed protective visor project. The instructions and designs are extremely similar and I encourage you to first read the 3DVerkstan documentation. If you can fit the 3DVerkstan design on your 3D-printer please use that design and not the Advanced Face Shield design on this page.
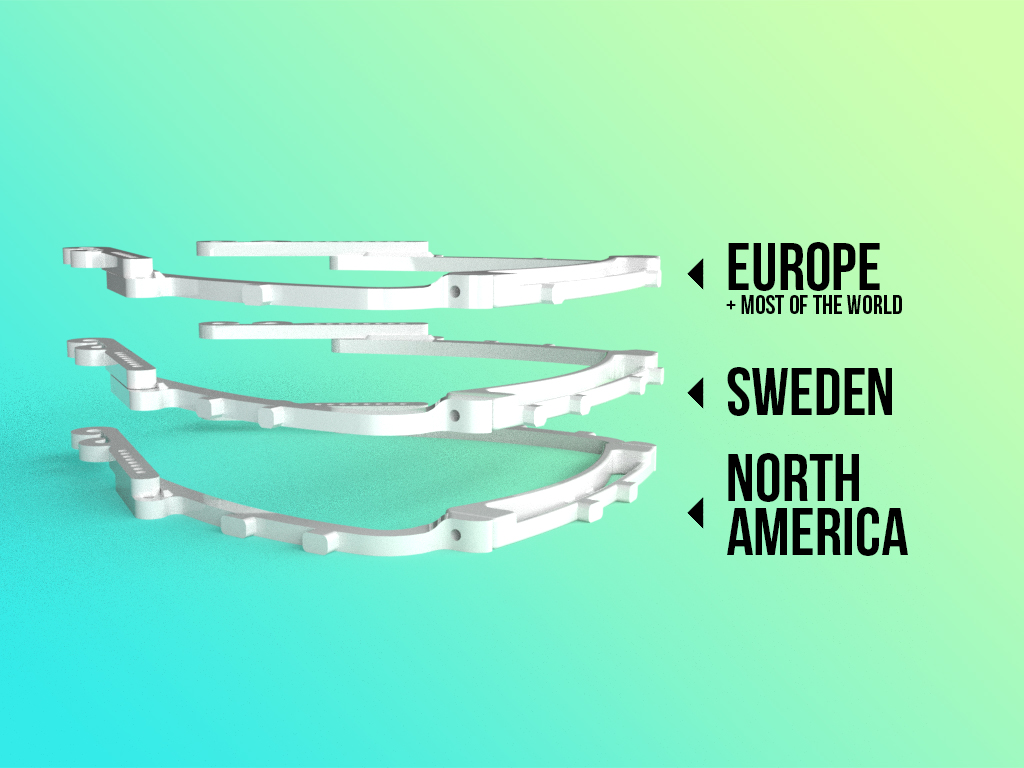
Step 1: Download files and select your version based on your region
Please review the 3DVerkstan 3D-printed protective visor version guide for help choosing which version to select. You’ll also need to refer to that page for creating the plastic sheet that goes on the front of the face shield.
Download all files at https://www.youmagine.com/designs/advanced-face-shield-based-on-the-3dverkstan-protective-visor
Step 2: 3D-print the selected models
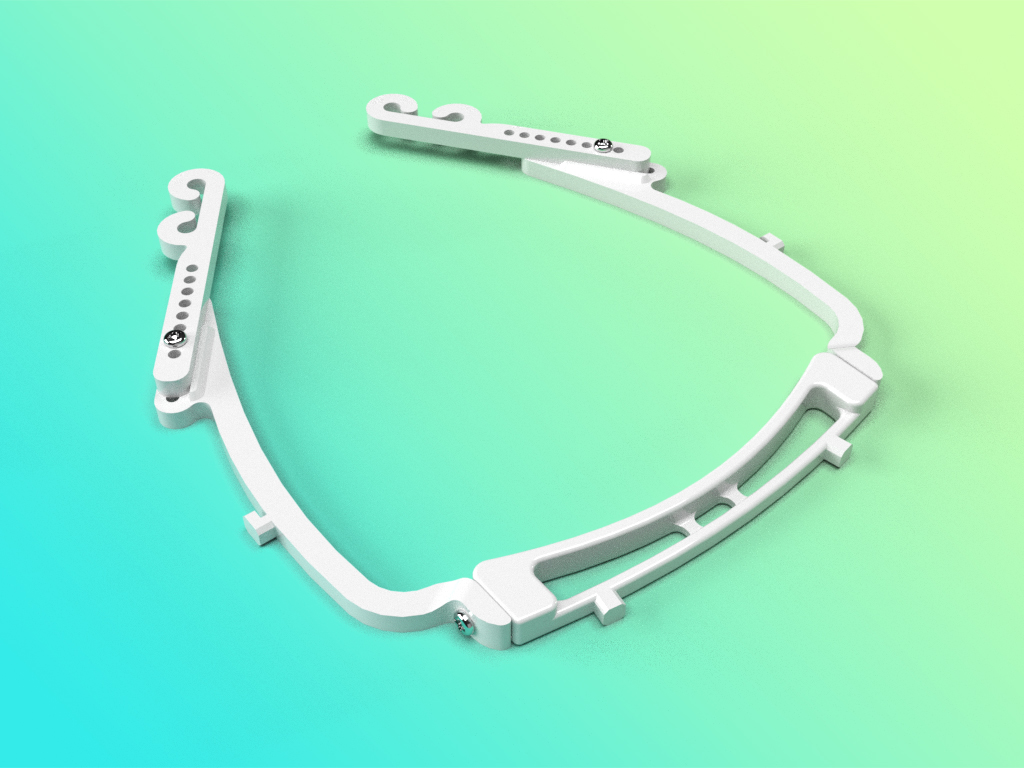
In the file you downloaded, you’ll find ‘Forehead.obj’, ‘Arm_PartA.obj’, and ‘Arm_PartB.obj.
- Print 1 ‘Forehead.obj’ piece
- Print 2 ‘Arm_PartA.obj’ pieces. One will need to be mirrored.
- Print 2 ‘Arm_PartB.obj’ pieces. One will need to be mirrored.

Step 3: Assemble the 3D-printed components using 4 M3x10mm screws
This model is designed to be assembled using 4 M3x10mm screws, though you may have luck using other sized screws.
The length of the arms are adjustable to fit the user.
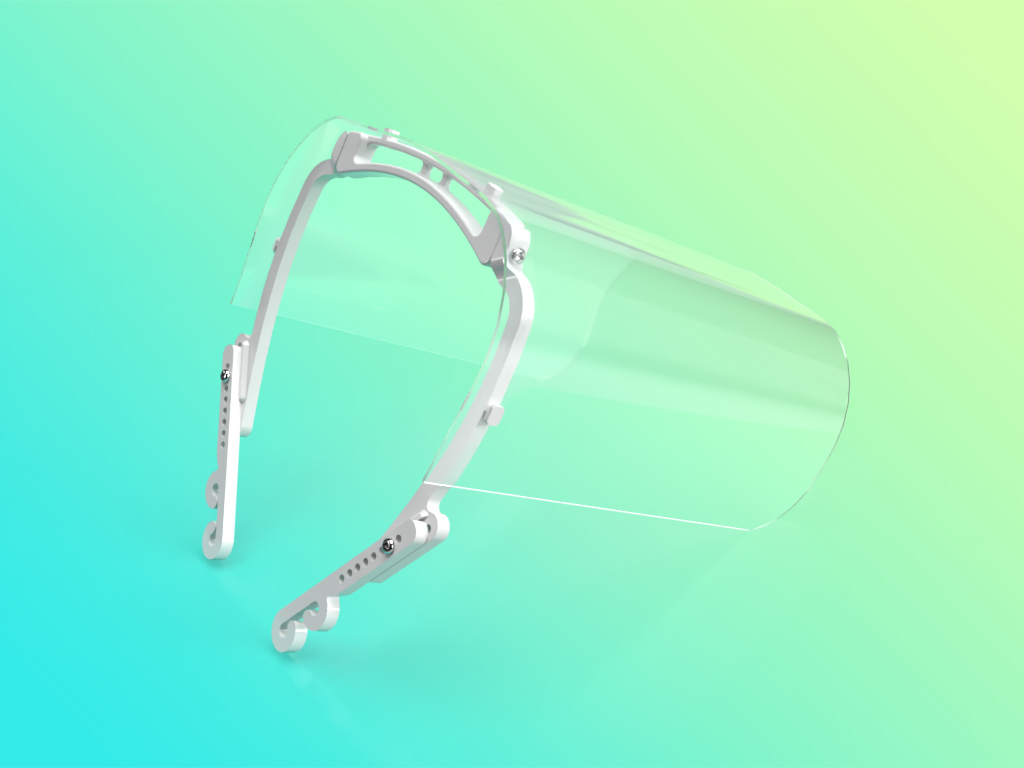
Step 4: Create and attach the plastic sheet
Please refer to the 3DVerkstan 3D-printed protective visor version guide for assistance creating the plastic sheet for the front of the face shield. You may need to download template files from 3DVerkstan for assistance in manufacturing the plastic sheet.
If you’re using the North-American version, you may need to download the additional ‘spacer piece’ from 3DVerkstan.
I can confirm that the European headband model will fit the plastic sheet perfectly, though I have been unable to test the Swedish and North-American versions. Manual adjustment may be required.
Step 5: Review the safety recommendations (again)
Please ensure that you correctly followed the safety recommendations from the beginning of this guide. Safety recommendations: https://3dprint.com/265620/safety-recomendations-for-3d-printed-covid-19-medical-devices-part-one/
Originally designed for the #HackTheCrisisAU hackathon on the 4th/5th April 2020. More info about this project: https://devpost.com/software/test-7pan41
Completely redesigned and improved for the ACS #FlattenTheCurve hackathon on the 10th/11th April 2020 with assistance from Jed Hodson. More info about this project: https://www.youtube.com/watch?v=thd2wdKlH18